How to Set Up Your Vlogging Camera for Stunning Videos
Introduction
When creating high-quality vlogs, setting up your vlogging camera properly is just as important as your content itself. No matter how creative your ideas or how skilled you are in editing, if your video quality is subpar, your audience might lose interest quickly. Fortunately, with a solid understanding of your camera’s settings, the right accessories, and a bit of practice, you can create stunning vlogs that captivate your viewers.
In this guide, we’ll walk you through everything you need to know about setting up your vlogging camera for the best possible results. From optimizing your camera’s resolution to getting the perfect lighting, we’ll ensure that you have all the tools necessary to produce professional-quality vlogs. Let’s dive into the details!
Section 1: Understanding Your Vlogging Camera
1.1 The Basics of a Vlogging Camera
Before you can fine-tune your camera settings, it’s crucial to understand the basic components of your vlogging camera. Whether you choose a DSLR, mirrorless, or point-and-shoot camera, each type has its strengths. The key is to choose a camera that matches your vlogging needs.
- DSLR Cameras: These cameras are known for their high-quality video and photos due to their larger sensors. They can offer stunning depth of field and cinematic shots. However, their bulkier size may not be ideal for vloggers on the go.
- Mirrorless Cameras: These cameras have similar performance to DSLRs but in a more compact body. They are excellent for vloggers because they are portable and still provide high-quality video and fast autofocus.
- Point-and-Shoot Cameras: If portability is your top priority, these are a great option. While they may have fewer manual controls, many modern point-and-shoot cameras, like the Sony ZV-1, offer excellent video quality and built-in stabilization.
Once you’ve chosen your camera, familiarize yourself with the basic features, such as resolution, autofocus, image stabilization, and microphone input. These features will help you capture high-quality footage.
1.2 Key Features to Focus On
When setting up your camera, there are a few key features that will directly impact the quality of your vlogs. By focusing on these, you can ensure your videos stand out.
- Autofocus: Autofocus is a must-have feature for vloggers. It ensures that the camera quickly and accurately locks onto your face or the subject you’re filming. Look for cameras with fast and reliable autofocus, like the Sony ZV-1 or Canon EOS M50, which are both known for their exceptional autofocus systems.
- Image Stabilization: This feature is essential for minimizing shaky footage, especially when you’re filming while moving. Image stabilization (either in-body or in-lens) can make a huge difference in the quality of your videos, particularly for vlogs filmed on the move.
- Flip Screen: A flip screen allows you to see yourself while filming, ensuring you’re properly framed and in focus. This is especially helpful for solo vloggers who need to keep track of their shots.
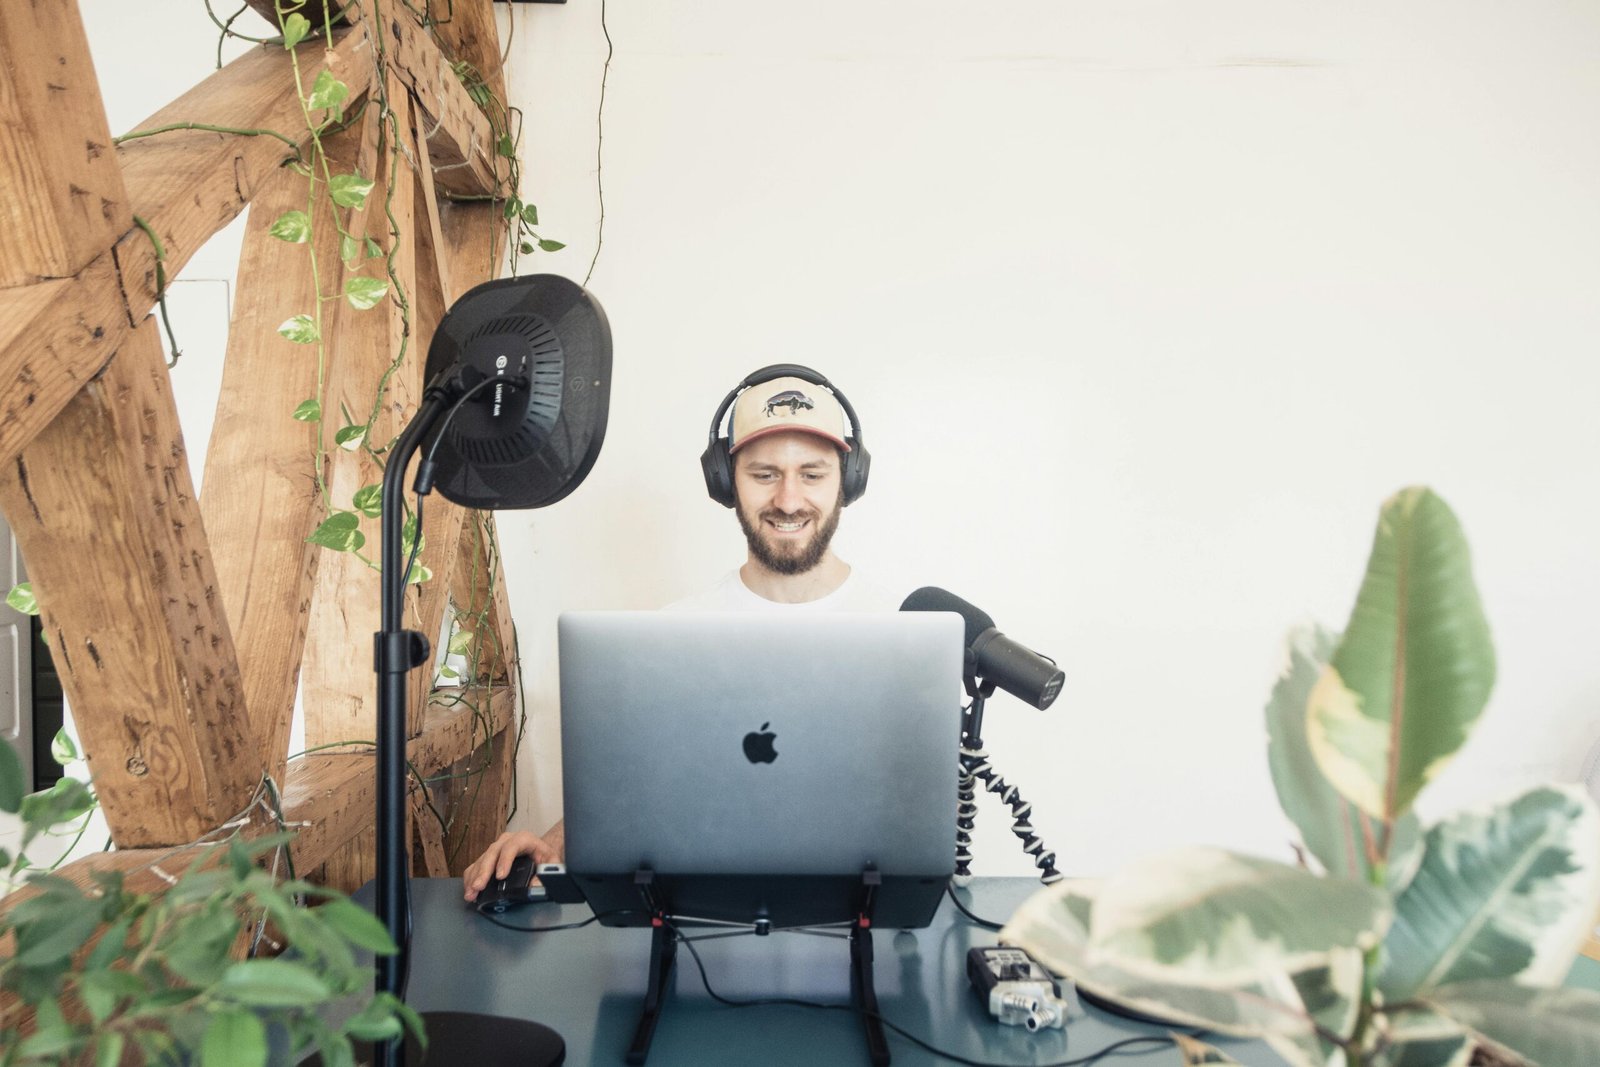
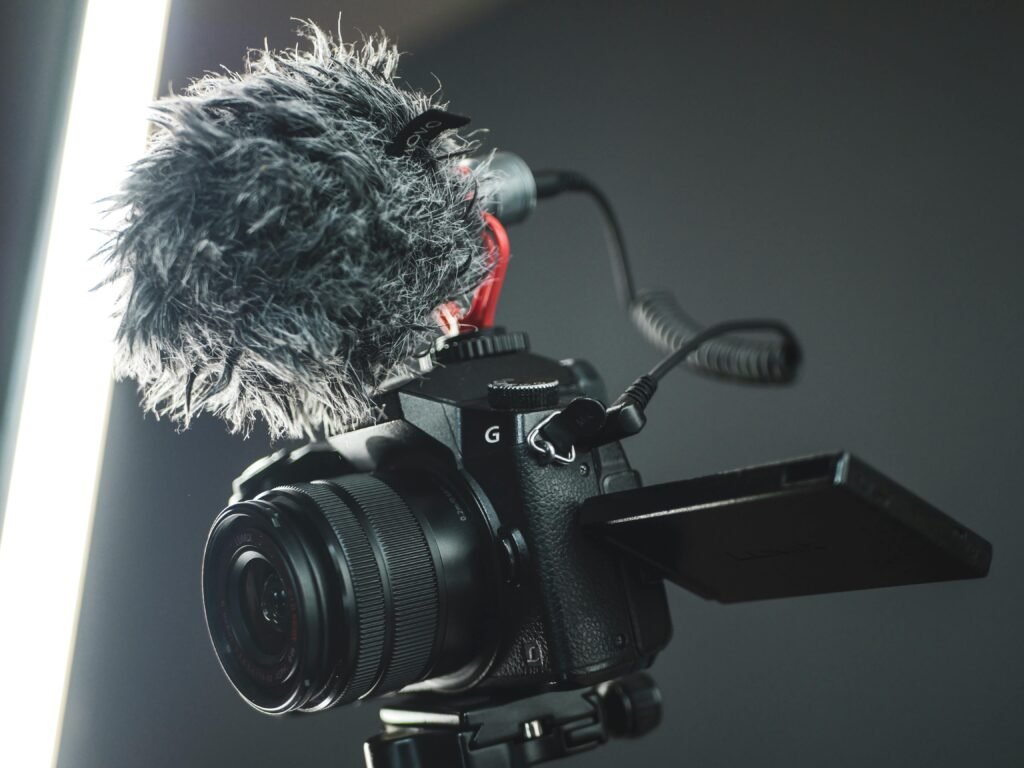
- Microphone Input: Built-in microphones are often inadequate for professional-sounding audio. A camera with an external microphone input allows you to use high-quality microphones, which significantly improves the sound quality of your vlogs.
Now that we’ve covered the basics, let’s take a deeper look at how to adjust your camera settings for optimal video quality.
Section 2: Setting Up the Camera for Optimal Video Quality
2.1 Camera Resolution: 1080p vs. 4K
One of the most crucial decisions you’ll need to make is choosing the right resolution for your vlogs. The two most popular options are 1080p and 4K. Understanding the differences between these two can help you make an informed choice.
- 1080p: This resolution is widely used for YouTube and most social media platforms. It offers sharp image quality and is less demanding on your storage. For everyday vlogs, 1080p is more than enough. It’s also more manageable when it comes to editing, as the file sizes are smaller.
- 4K: If you’re aiming for ultra-crisp video and want more flexibility during editing (for example, cropping or zooming in without losing image quality), 4K is the way to go. However, filming in 4K requires larger storage and more powerful editing equipment.
Here’s a quick look at the pros and cons of both resolutions:
Feature1080 v 4K
| Feature | 1080p | 4K |
|---|---|---|
| Video Quality | Excellent for most vlogs | Ultra-crisp, highly detailed |
| File Size | Smaller, easier to manage | Larger, requires more storage |
| Editing Flexibility | Limited cropping options | High flexibility in post-production |
| Recommended For | YouTube, social media vlogs | Cinematic content, high-end vlogs |
2.2 Frame Rate: How to Choose the Right One
Now, let’s talk about frame rate. The frame rate dictates how smooth or cinematic your footage looks. The most common frame rates for vlogging are 24fps, 30fps, and 60fps. Each one serves a different purpose.
- 24fps: This is the standard frame rate used in the film, giving your vlogs a cinematic, movie-like feel. It’s ideal if you’re looking for a more artistic look or telling a story.
- 30fps: This is the most common frame rate for YouTube and social media videos. It’s perfect for everyday vlogging and offers a good balance between smoothness and file size.
- 60fps: If you’re filming fast-paced content, such as sports or action sequences, 60fps will capture smooth, fluid motion. It’s also perfect for slow-motion shots in post-production.
Each frame rate affects how your footage looks, so choose the one that best fits the style of your content.
2.3 White Balance and Color Settings
Getting the right white balance is essential for ensuring your videos look natural and true to life. Different lighting conditions can cause your videos to look too warm or too cool. Here’s how to handle it:
- Indoor Lighting: If you’re filming indoors under tungsten light, use the Tungsten or Incandescent setting to balance the yellowish tones.
- Outdoor Lighting: For daylight, the Daylight or Sunny preset works well. This helps keep the colors looking natural and vibrant.
Additionally, many cameras offer color profiles that can further enhance the look of your footage. For example, Sony’s S-Log or Canon’s C-Log are profiles that give your videos a flat look, ideal for color grading in post-production.
Section 3: Essential Camera Settings for Stunning Vlogs
3.1 Exposure Settings: Shutter Speed, Aperture, and ISO
Exposure is key to capturing clear, vibrant video. It’s determined by three main settings: shutter speed, aperture, and ISO. Here’s how they work together:
- Shutter Speed: A rule of thumb for vlogging is to set your shutter speed to 1/50th of a second, which mimics natural motion blur. This helps achieve smooth and cinematic footage.
- Aperture: A wide aperture (low f-number like f/2.8) allows more light into the camera, creating a beautiful background blur (also known as bokeh). A shallow depth of field draws attention to your subject while softening the background.
- ISO: ISO controls the camera’s sensitivity to light. Keep ISO as low as possible to avoid grainy footage. In low-light conditions, increase the ISO, but avoid going too high, as it can introduce noise.
3.2 Focus Settings: Manual vs. Autofocus
When vlogging, you’ll need to choose between manual focus and autofocus. Here’s a breakdown:
- Autofocus: Ideal for solo vloggers who are filming themselves or need to quickly switch focus between subjects. Make sure your camera has fast, reliable autofocus to avoid blurry footage.
- Manual Focus: If you’re filming in a controlled environment, manual focus gives you complete control over the shot. This is especially useful for more artistic, deliberate shots.
3.3 Image Stabilization: Achieving Smooth Shots
Image stabilization is essential for achieving smooth, shake-free footage, particularly if you’re filming while walking or moving. There are two types of stabilization to consider:
- In-Body Stabilization (IBIS): Found in many mirrorless and DSLR cameras, IBIS helps reduce shake by stabilizing the camera’s sensor.
- Lens Stabilization: Many lenses have built-in stabilization, which helps when filming with zoom lenses.
You can also consider using a gimbal to ensure ultra-smooth footage during movement.
Section 4: Framing and Composition Tips for Vlogs
4.1 The Rule of Thirds: Framing Your Shots
The Rule of Thirds is a fundamental photography and videography principle that helps create visually engaging shots. Imagine dividing the frame into a 3×3 grid. By placing your subject along the grid lines or at the intersections, you create a balanced, dynamic shot.
4.2 Camera Angles and Perspectives
Varying your camera angles can add interest and energy to your vlogs. Here are a few common angles:
- Eye-Level: The most natural and neutral perspective, great for talking directly to the camera.
- High Angle: Makes the subject appear smaller or more vulnerable.
- Low Angle: This creates a powerful, dominant look for your subject.
4.3 Framing Yourself: Tips for Solo Vloggers
As a solo vlogger, ensuring you’re framed properly in the shot is crucial. Keep the camera at eye level for the most flattering angle. Avoid having too much or too little space above your head (known as headroom). Keep your distance from the camera consistent, and be mindful of the background.
Section 5: Lighting Setup for Vlogging Success
5.1 The Importance of Proper Lighting
Good lighting can dramatically improve the quality of your vlogs. Without it, even the best camera settings may look dull. Proper lighting highlights your face and surroundings, giving your vlogs a polished, professional appearance.
5.2 How to Use Natural Light Effectively
If you’re filming during the day, take advantage of natural light. Position yourself near a window to take advantage of soft, diffused light. Avoid harsh, direct sunlight, which can cause overexposure or unflattering shadows. If you’re shooting indoors, consider filming during the golden hour—the hour before sunset or after sunrise—for the best lighting conditions.
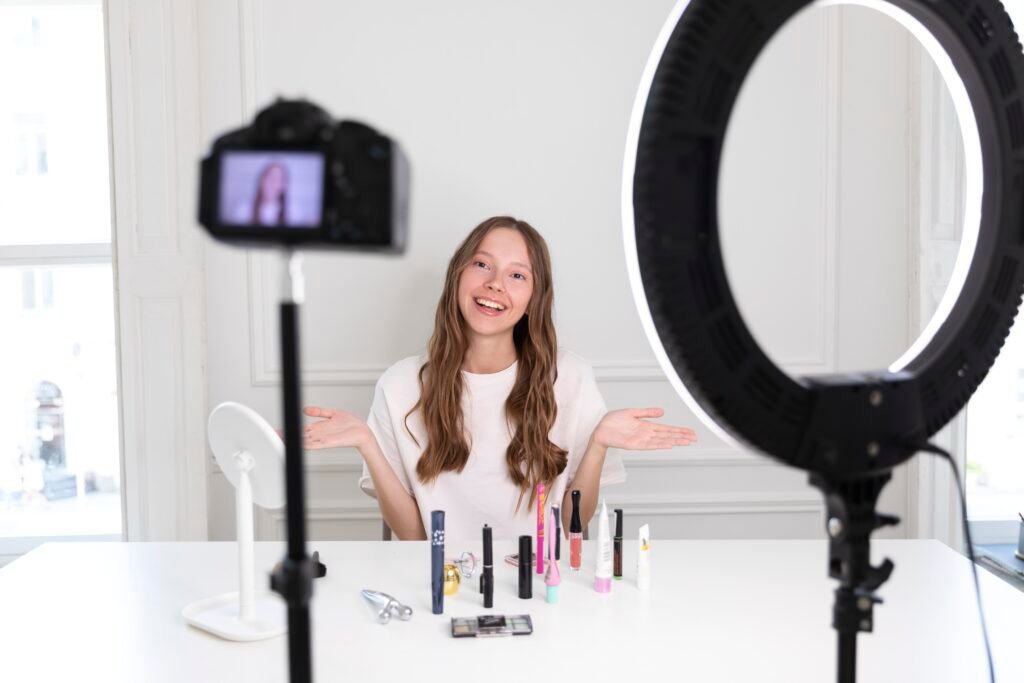
5.3 Artificial Lighting: Softboxes, LED Panels, and Ring Lights
When filming indoors or at night, you’ll need artificial lighting. Some options include:
- Softboxes: Provide soft, even lighting that reduces shadows and creates a flattering look.
- LED Panels: Offer adjustable brightness and color temperature, making them ideal for controlling lighting in any situation.
- Ring Lights: Especially popular with beauty and lifestyle vloggers, these create an even, glowing light that reduces shadows.
Section 6: Audio Setup for Professional Sound
6.1 Why Audio Quality Matters in Vlogging
While video quality is important, audio is just as critical to delivering a professional vlog. Bad audio can make even the best footage seem unprofessional and hard to watch. Poor sound distracts from your message and can leave your audience frustrated.
6.2 Best Microphones for Vlogging
Good audio is essential, so invest in a high-quality microphone. Some popular options include:
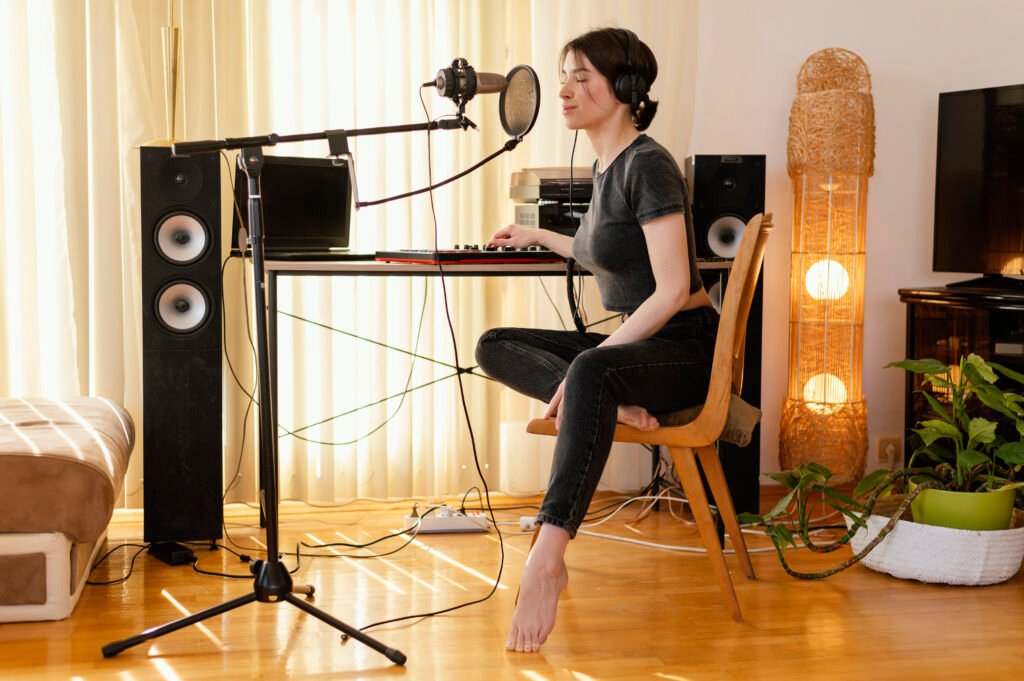
- Shotgun Microphones: These are directional microphones that capture sound from one specific source, making them great for reducing background noise.
- Lavalier Microphones: These clip-on mics are ideal for hands-free recording, allowing you to move around without losing audio quality.
- Handheld Microphones: If you’re conducting interviews or doing on-the-go recording, handheld microphones are excellent choices.
6.3 Tips for Managing Audio in Different Environments
When filming in noisy environments or outdoors, you need to manage sound effectively. Use a windscreen or dead cat on your microphone to reduce wind noise, and always position your mic as close to your subject as possible.
Final Thoughts: Creating Your Best Vlogs Yet
By mastering these camera settings and techniques, you’ll be well on your way to creating stunning vlogs that capture the attention of your audience. Whether you’re filming indoors with artificial lighting or outdoors using natural light, each setting plays a role in making your videos look professional. Don’t forget to experiment, keep learning, and most importantly—have fun creating content that resonates with your viewers!
Frequently Asked Questions (FAQ)
1. What camera is best for vlogging? The Canon EOS M50 Mark II, Sony ZV-1, and GoPro HERO10 are excellent options for vloggers, depending on your needs for portability, video quality, and budget.
2. How do I improve my video quality? To enhance video quality, focus on optimizing your camera settings such as resolution, frame rate, and exposure. Additionally, invest in good lighting and external microphones to improve both video and audio quality.
3. Is it worth investing in a 4K camera for vlogging? If you’re aiming for the highest quality possible or want to future-proof your content, a 4K camera offers superior video resolution and editing flexibility. However, 1080p is more than sufficient for most vlogging needs.
4. Can I vlog with my smartphone? Yes! Many smartphones today, especially those from Apple and Samsung, offer great video quality. Pair it with a tripod and an external microphone for a simple but effective vlogging setup.
With this comprehensive guide, you now have the knowledge and tools to set up your vlogging camera like a pro! Whether you’re just starting or looking to elevate your existing content, these tips will ensure your videos are clear, engaging, and visually stunning. Happy vlogging!